# 後端
# views
# order_views.py
# 取得所有訂單
@api_view(['GET'])
@permission_classes([IsAdminUser])
def adminGetAllOrders(request):
    orders = Order.objects.all()
    serializer = OrderSerializer(orders, many=True)
    return Response(serializer.data)
# urls
# order_urls.py
path('', views.adminGetAllOrders, name='get-all-orders'),
# Postman 測試
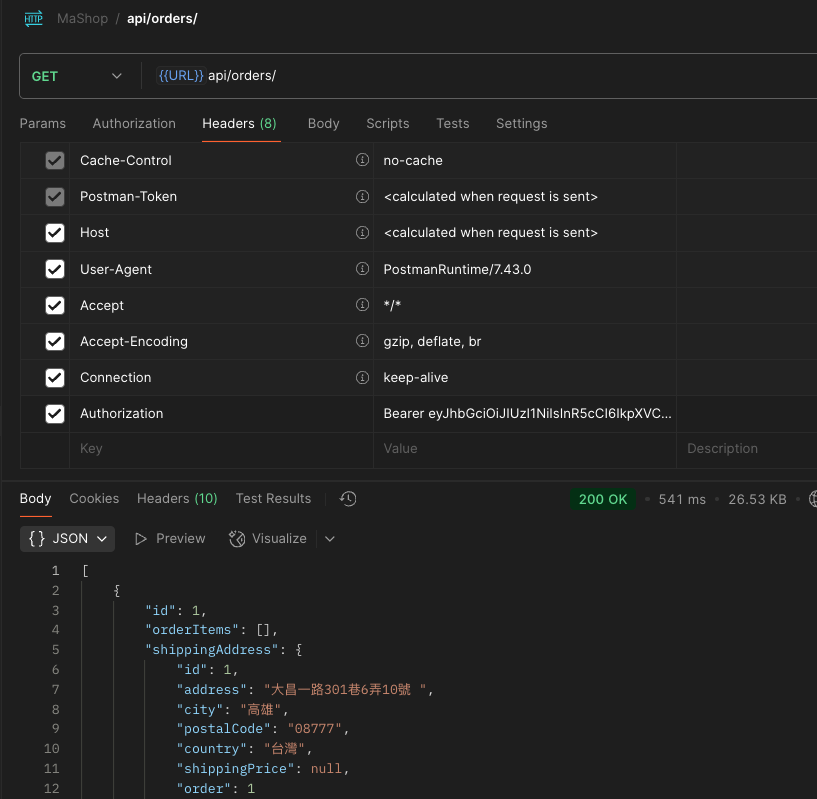
老套路,後端寫好 API 後,先用 Postman 測試看是否有成功回傳資料,一樣帶入擁有 admin 權限的 token 來檢視所有訂單資料
# 前端
# constants 定義常數
// orderConstants.js
export const ORDER_LIST_ALL_REQUEST = "ORDER_LIST_ALL_REQUEST";
export const ORDER_LIST_ALL_SUCCESS = "ORDER_LIST_ALL_SUCCESS";
export const ORDER_LIST_ALL_FAIL = "ORDER_LIST_ALL_FAIL";
# reducers
基本上 reducers 與列出用戶個人的訂單差不多,只差在 orderListAllReducer 不需要 RESET
// orderReducers.js
// 管理員檢視所有訂單
export const orderListAllReducer = (state = { orders: [] }, action) => {
 switch (action.type) {
  case ORDER_LIST_ALL_REQUEST:
   return { loading: true };

  case ORDER_LIST_ALL_SUCCESS:
   return { loading: false, orders: action.payload };

  case ORDER_LIST_ALL_FAIL:
   return { loading: false, error: action.payload };

  default:
   return state;
 }
};
# actions
// orderActions.js
// 管理員列出所有訂單
export const listAllOrders = () => async (dispatch, getState) => {
try {
dispatch({
type: ORDER_LIST_ALL_REQUEST,
});
const {
userLogin: { userInfo },
} = getState();
const config = {
headers: {
"Content-type": "application/json",
Authorization: `Bearer ${userInfo.token}`,
},
};
const { data } = await axios.get(`/api/orders/`, config);
dispatch({
type: ORDER_LIST_ALL_SUCCESS,
payload: data,
});
} catch (error) {
dispatch({
type: ORDER_LIST_ALL_FAIL,
payload: error.response && error.response.data.detail ? error.response.data.detail : error.message,
});
}
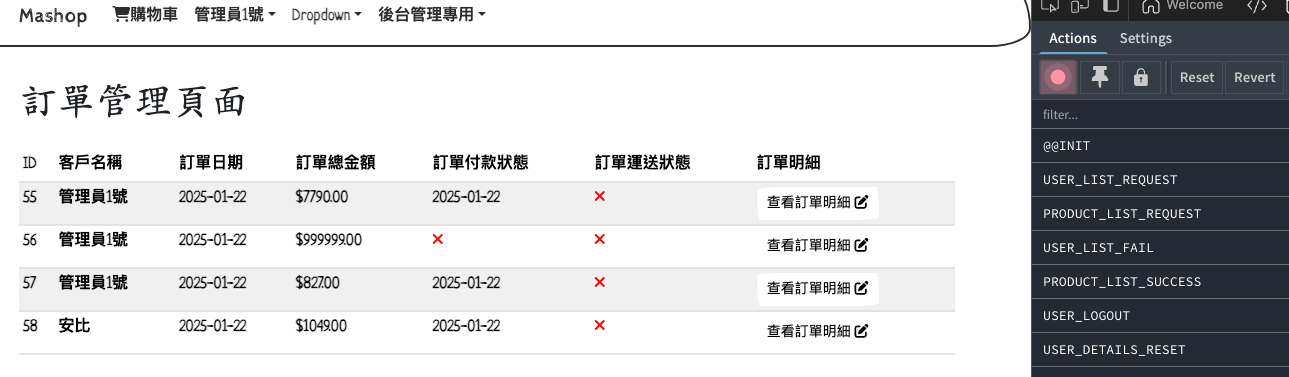
};# 訂單管理前端頁面
此頁面也比較單純,目標單純只有:
- 列出所有訂單,非管理員無法進入此頁面(已在
App.js用<AdminRoute>限制:<Routh path=....<AdminRoute><OrderListPage /></AdminRoute>) createdAt、paidAt、deliveredAt只取重要日期部分,判斷若有付款或運送完畢就顯示日期,否則顯示紅色叉叉- 訂單明細按鈕,點擊後直接導向該訂單明細頁面
// OrderListPage.js
const dispatch = useDispatch();

const orderListAll = useSelector((state) => state.orderListAll);
const { loading, error, orders } = orderListAll;

useEffect(() => {
 dispatch(listAllOrders());
}, [dispatch]);

return (
...
{orders.map((order) => (
  <td> {order.createdAt.substring(0, 10)} </td>
  ...
  <td>{order.isPaid ? order.paidAt.substring(0, 10) : <i className='fas fa-times' style=<!--swig0-->></i>}</td>
  <td>{order.isDelivered ? order.deliveredAt.substring(0, 10) : <i className='fas fa-times' style=<!--swig1-->></i>}</td>
  ...
  <td>
    <LinkContainer to={`/order/${order.id}`}>
      <Button variant='light' className='btn-sm'>
        查看訂單明細 <i className='fas fa-edit'></i>
      </Button>
    </LinkContainer>
  </td>
))}
);
最後一樣至 App.js 加入路由並用 <AdminRoute> 包裹以限制非管理員無法進入此頁面
最後成品畫面如下: