# 流程
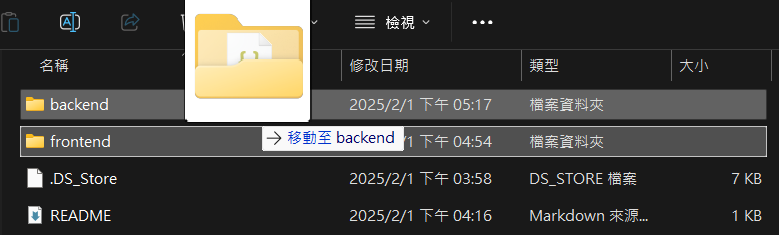
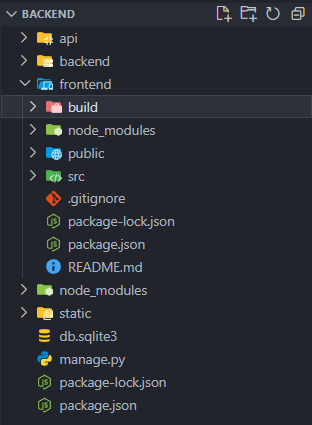
首先將 frontend 資料夾直接移動至 backend 資料夾內,因為最終是用後端的 Django 來 serve 前端的 React,所以目前整個專案的檔案結構應該會變成如下所示:
# 前端 bundle
首先要讓前端程式不再處於開發模式,而是將其打包(bundle)成靜態檔,直接讓後端的 Django 讀取
❯ cd frontend
...
❯ npm run build
基本上成功後就能看到以下回傳:
> frontend@0.1.0 build
> react-scripts build

Creating an optimized production build...
Compiled successfully.

File sizes after gzip:

  130.92 kB  build/static/js/main.1f4e7b1a.js
  29.17 kB   build/static/css/main.fb08168c.css

The project was built assuming it is hosted at /.
You can control this with the homepage field in your package.json.

The build folder is ready to be deployed.
You may serve it with a static server:
...
並且在 frontend 資料夾下會多出一個 build 資料夾,接下來就不需要在像之前一樣在 frontend 資料夾下執行 npm run start,而是直接在 backend 資料夾下執行 python manage.py runserver,Django 就會自動 serve 前端的 React 檔案
# 修改 settings
回到 settings.py,並在 TEMPLATES 的 DIRS 新增 os.path.join(BASE_DIR,"frontend/build"),告訴 Django 去哪裡找我們前端的 Template 檔案
# settings.py
...
TEMPLATES = [
    {
        'BACKEND': 'django.template.backends.django.DjangoTemplates',
        'DIRS': [
            os.path.join(BASE_DIR,"frontend/build"), # 告訴 Django 去哪裡找我們的 Template 檔案
        ],
        'APP_DIRS': True,
        'OPTIONS': {
            'context_processors': [
                'django.template.context_processors.debug',
                'django.template.context_processors.request',
                'django.contrib.auth.context_processors.auth',
                'django.contrib.messages.context_processors.messages',
            ],
        },
    },
]
回到 urls.py 中加入以下程式碼,告訴 Django 原本專案的根路由 '' 要載入 React 的 index.html
接下來此路由 path('', TemplateView.as_view(template_name='index.html')) 就能載入 React 的 index.html
# urls.py
from django.views.generic import TemplateView
urlpatterns = [
path('admin/', admin.site.urls),
path('', TemplateView.as_view(template_name='index.html')), # 讓 React 的 index.html(原localhost:3000)靜態頁面能被 Django(localhost:8000) 載入
path('api/products/', include('api.urls.product_urls')),
path('api/users/', include('api.urls.user_urls')),
path('api/orders/', include('api.urls.order_urls')),
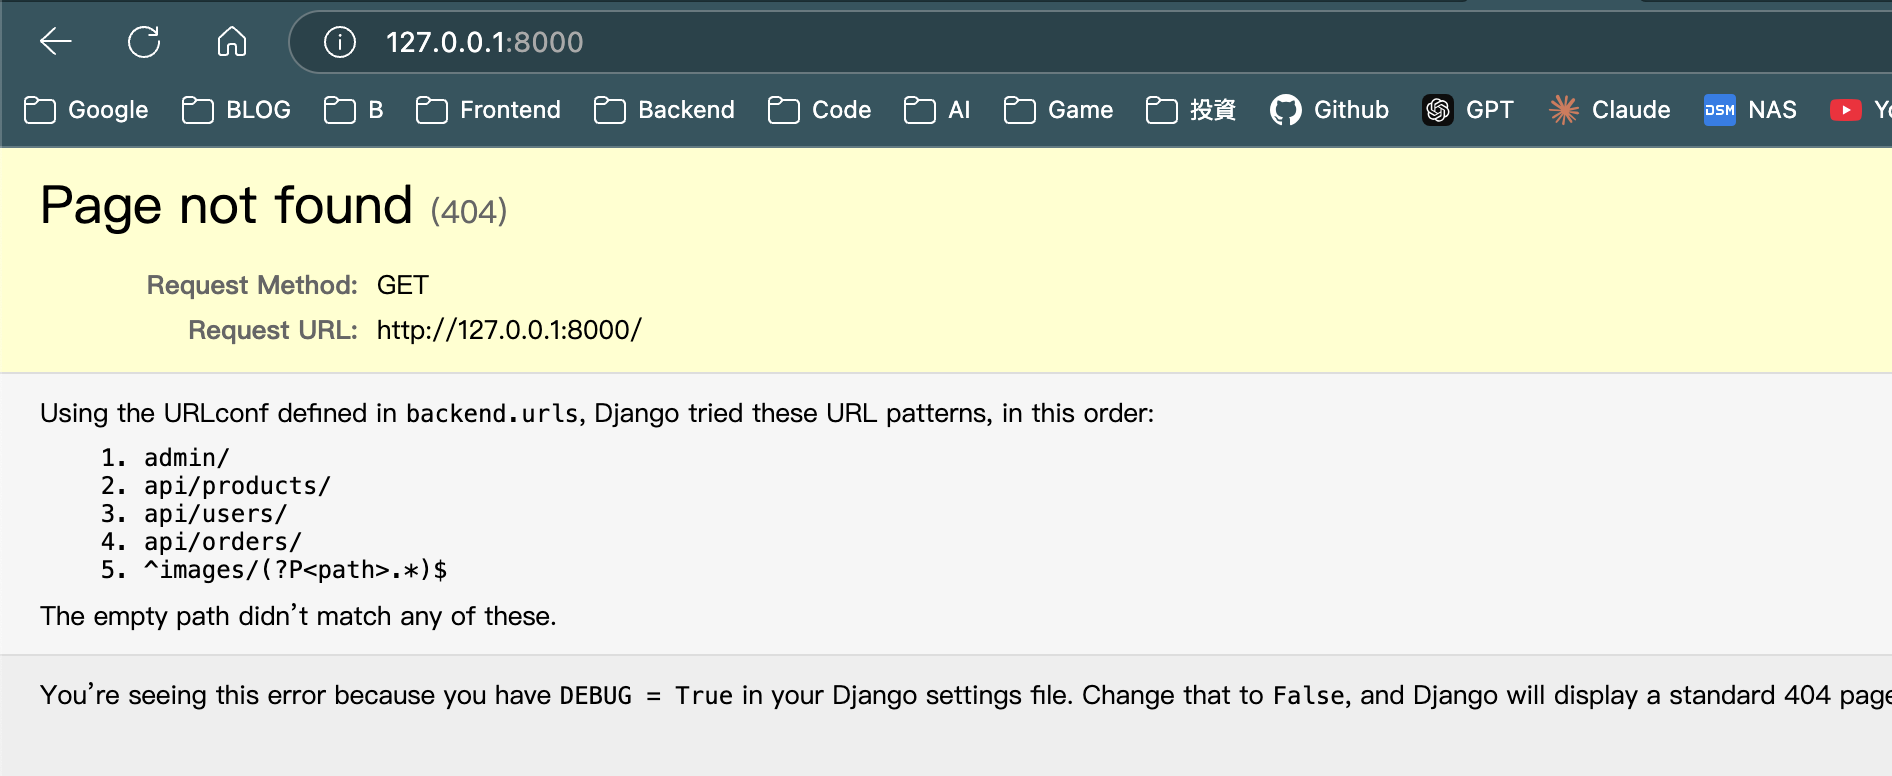
]原本的 localhost:8000 是 Django 的後端頁面:
然後回到 settings.py 中加入以下程式碼,告訴 Django 去哪裡找我們的靜態檔案
# settings.py
# 放靜態文件的路徑,可指定多個
# collectstatic = Django掃遍 STATICFILES_DIRS 裡的絕對路徑逐一蒐集到 STATIC_ROOT裡
STATICFILES_DIRS = [
    BASE_DIR / 'static',
    BASE_DIR / 'frontend/build/static'
]
那接下來若有修改前端的程式碼,就是需要重新 build 一次,然後重新執行 python manage.py runserver,就能看到修改後的結果,現在同樣到localhost:8000 就能直接看到寫好的前端頁面了