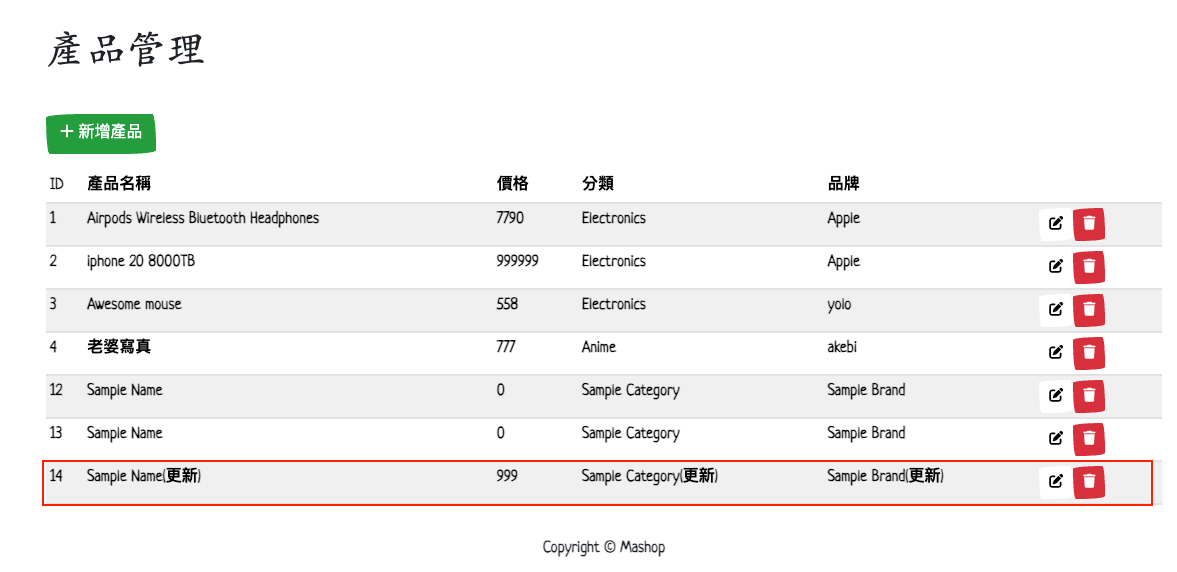
# 產品管理列表前端頁面
建立一個新的頁面,用來管理產品,包含新增、編輯、刪除、查看產品的功能
- import 先前寫好的
listProduct的 Action - 調用
ProductList的 state,取得所有產品 - 用
map迭代遍歷products陣列,並顯於產品列表上加上新增、刪除按鈕
// ProductListPage.js
import { listProducts } from "../actions/productActions";
...
const ProductList = useSelector((state) => state.ProductList);
const { loading, error, products } = ProductList;
...
return(
 ...
 <Row className='align-items-center'>
  <Col className='text-right'>
   <Button className='my-3' variant="success" onClick={createProductHandler}>
    <i className='fas fa-plus'></i> 新增產品
   </Button>
  </Col>
  <Col className='text-right'>
   <Button className='my-3' variant="danger" onClick={deleteProductHandler}>
    <i className='fas fa-plus'></i> 刪除產品
   </Button>
  </Col>
 </Row>
 ...
 <Table striped hover responsive className='table-sm table-light'>
 ...
 {products.map((product) => {
  ...
 })}
 </Table>
)
# 後端實作 CRUD API - 刪除
一樣先建立對應的 views 實作功能,再建立對應的 urls 給 前端的 axios 調用
# views
# product_views.py
@api_view(['DELETE'])
@permission_classes([IsAdminUser])
def deleteProduct(request,id):
    product = Product.objects.get(id=id)
    product.delete()
    return Response('產品刪除成功!')
# urls
# product_urls.py
...
path('delete/<str:id>', views.deleteProduct,name="deleteProduct"),
# 前端實作刪除功能
# constants
export const PRODUCT_DELETE_REQUEST = "PRODUCT_DELETE_REQUEST";
export const PRODUCT_DELETE_SUCCESS = "PRODUCT_DELETE_SUCCESS";
export const PRODUCT_DELETE_FAIL = "PRODUCT_DELETE_FAIL";
# reducers
所有刪除相關動作就不需要回傳 product: action.payload了,只需回傳 loading 和 success 狀態即可
export const ProductDeleteReducer = (state = {}, action) => {
 // 刪除產品
 switch (action.type) {
  case PRODUCT_DELETE_REQUEST:
   return { loading: true };
  case PRODUCT_DELETE_SUCCESS:
   return { loading: false, success: true }; // 刪除不需要回傳資料
  case PRODUCT_DELETE_FAIL:
   return { loading: false, error: action.payload };
  default:
   return state;
 }
};
# actions
由於刪除產品需要 admin 權限,所以要在 actions 中加入 token 來驗證
export const deleteProduct = (id) => async (dispatch, getState) => {
 // action 的函式命名一般都是 動詞在前+名詞

 try {
  dispatch({
   type: PRODUCT_DELETE_REQUEST,
  });

  const {
   userLogin: { userInfo },
  } = getState();

  const config = {
   headers: {
    "Content-type": "application/json",
    Authorization: `Bearer ${userInfo.token}`,
   },
  };

  const { data } = await axios.delete(`/api/products/delete/${id}`, config);

  dispatch({
   type: PRODUCT_DELETE_SUCCESS,
   payload: data,
  });
 } catch (error) {
  dispatch({
   type: PRODUCT_DELETE_FAIL,
   payload: error.response && error.response.data.detail ? error.response.data.detail : error.message,
  });
 }
};
# 產品管理清單頁面(刪除按鈕)前端實作
每當刪除完產品時,應自動重新載入產品列表,所以這邊將 useEffect 加入 successDelete 來監聽是否刪除成功,若成功就「重新載入產品列表」。
const productDelete = useSelector((state) => state.productDelete);
const { loading: loadingDelete, error: errorDelete, success: successDelete } = productDelete;

useEffect(() => {
 dispatch(listProducts());
}, [dispatch, successDelete]); // 這邊放入 successDelete,因為要在刪除使用者後自動重新載入頁面
# 後端實作 CRUD API - 新增/更新
此專案新增產品的邏輯與一般網站較不同的是,與其導向到一個新的 Form 頁面,再逐一填寫產品資料,這邊直接創建一個有預設資料的產品,並導向至該產品的「編輯頁面」,讓使用者直接在編輯頁面進行產品資料的編輯,可以達到更簡潔、高效的操作流程,所以這邊會同時製作 CREATE、UPDATE 功能
也就是說新增以及編輯產品會導向同一個頁面
# views
在createProduct 的 view 部分,有個很愚蠢的邏輯謬誤讓我腦袋卡了一下,在創建產品時壓根不會有 data['name']、data['price]... 這些資料,因為根本還「不存在」!
導致我原本寫 data['name'] ,按下創建商品一直報 500 ERROR,後來才發現本來就應該先預設 sample 值帶入 product,這樣才能有資料可以編輯
# product_views.py
@api_view(['PUT'])
@permission_classes([IsAdminUser])
def updateProduct(request, pk): # pk = primary key,產品的 id
data = request.data
product = Product.objects.get(id=pk)
product.name = data['name']
product.price = data['price']
product.brand = data['brand']
product.countInStock = data['countInStock']
product.category = data['category']
product.description = data['description']
product.save()
serializer = ProductSerializer(product, many=False)
return Response(serializer.data)
@api_view(['POST'])
@permission_classes([IsAdminUser])
def createProduct(request):
user = request.user
product = Product.objects.create( # 預設產品資料
user=user,
name='Sample Name',
price=0,
brand='Sample Brand',
countInStock=0,
category='Sample Category',
description='Sample Description',
)
serializer = ProductSerializer(product, many=False)
# print("Request Data:", serializer.data)
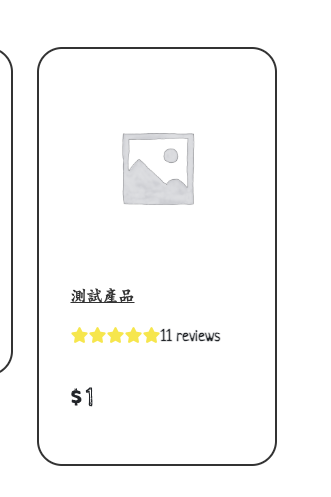
return Response(serializer.data)再創建商品時要有預設圖片的路徑,解決產品一開始沒有圖片的問題,這邊就把產品預設圖放到 /backend/static/images/ 資料夾下,並在 models.py 中設定該 image 預設路徑
# models.py
class Product(models.Model):
 ...
    image = models.ImageField(null=True,blank=True,default='/placeholder.png')
這樣就可以每次在創建商品時,都能先有一張預設圖片
以及查看 Postman 的回傳結果也能看到預設的產品圖片資料 "image": "/images/placeholder.png",

# urls
如果將 path('create/... 放在 path('<str:id>', views.getProduct_detail 之下,可能會發生「路由衝突」問題
比如當使用者訪問 http://127.0.0.1:8000/api/products/create/ 時, id=create 會被傳遞到 getProduct_detail 中做處理,此時就會發生找不到 id=create 的產品的錯誤,所以要將 create 放在 getProduct_detail 之上
# product_urls.py
...
path('create/', views.createProduct,name="product_create"),
path('<str:pk>', views.getProduct_detail,name="product_detail"),
...
path('update/<str:pk>', views.updateProduct,name="product_update"),
當按下新增產品的按鈕,就會馬上觸發 createProduct 這個 Action,並將使用者導向到編輯產品的頁面,所以其實當我們再創建產品時,同時就是在 「編輯產品」,只是這次是新增一個全新的產品而已
# 前端實作新增/更新產品功能
# constants
export const PRODUCT_CREATE_REQUEST = "PRODUCT_CREATE_REQUEST";
export const PRODUCT_CREATE_SUCCESS = "PRODUCT_CREATE_SUCCESS";
export const PRODUCT_CREATE_FAIL = "PRODUCT_CREATE_FAIL";

export const PRODUCT_UPDATE_REQUEST = "PRODUCT_UPDATE_REQUEST";
export const PRODUCT_UPDATE_SUCCESS = "PRODUCT_UPDATE_SUCCESS";
export const PRODUCT_UPDATE_FAIL = "PRODUCT_UPDATE_FAIL";
export const PRODUCT_UPDATE_RESET = "PRODUCT_UPDATE_RESET";
# reducers
export const productCreateReducer = (state = {}, action) => {
 // 新增產品
 switch (action.type) {
  case PRODUCT_CREATE_REQUEST:
   return { loading: true };
  case PRODUCT_CREATE_SUCCESS:
   return { loading: false, success: true, product: action.payload };
  case PRODUCT_CREATE_FAIL:
   return { loading: false, error: action.payload };
  case PRODUCT_CREATE_RESET:
   return {};
  default:
   return state;
 }
};

export const productUpdateReducer = (state = { product: [] }, action) => {
 switch (action.type) {
  case PRODUCT_UPDATE_REQUEST:
   return { loading: true };
  case PRODUCT_UPDATE_SUCCESS:
   return { loading: false, success: true, product: action.payload };
  case PRODUCT_UPDATE_FAIL:
   return { loading: false, error: action.payload };
  case PRODUCT_UPDATE_RESET:
   return { product: [] }; // 重置 product 狀態,清空舊資料,避免影響下一次操作或導致錯誤的資料顯示
  default:
   return state;
 }
};
# actions
在 axios.post 的部分多傳遞了一個空物件 {},確保其符合後端格式要求,若沒有加入 {},目前其實也能正確運作,但為了確保程式的穩定性,還是加上比較好
在 updateProduct 的 action 中,在更新完產品資訊後,一樣要能夠自動載入
export const createProduct = () => async (dispatch, getState) => {
 try {
  dispatch({
   type: PRODUCT_CREATE_REQUEST,
  });

  const {
   userLogin: { userInfo },
  } = getState();

  const config = {
   headers: {
    "Content-type": "application/json",
    Authorization: `Bearer ${userInfo.token}`,
   },
  };
  // console.log(config);
  const { data } = await axios.post(
   `/api/products/create/`,
   {}, // 預設空物件,沒有這個 {} 一樣能正常運作
   config
  );

  dispatch({
   type: PRODUCT_CREATE_SUCCESS,
   payload: data,
  });
 } catch (error) {
  dispatch({
   type: PRODUCT_CREATE_FAIL,
   payload: error.response && error.response.data.detail ? error.response.data.detail : error.message,
  });
 }
};
# 產品管理清單頁面(新增/編輯按鈕)前端實作
- 在
useEffect開頭直接先 dispatchPRODUCT_CREATE_RESET;,清空之前的產品創建狀態,避免頁面載入時因殘留的 Redux 狀態導致誤判或錯誤行為 - 在
useEffect中加入successCreate,當成功創建產品時,導向到該產品的編輯頁面 - 從後端
createProductview 返回序列化後的產品資料,透過productActions中的createProduct的AxiosPOST 請求,來請求新增產品,並在productCreateReducer的PRODUCT_CREATE_SUCCESS將後端回傳的產品資料儲存到state.product中,這就是navigate的createProduct.id的來源
// ProductListPage.js
...
const navigate = useNavigate();
const dispatch = useDispatch();

const productList = useSelector((state) => state.productList);
const { loading, error, products } = productList;

const productDelete = useSelector((state) => state.productDelete);
const { loading: loadingDelete, error: errorDelete, success: successDelete } = productDelete;

const productCreate = useSelector((state) => state.productCreate);
const { loading: loadingCreate, error: errorCreate, success: successCreate, product: createdProduct } = productCreate;

useEffect(() => {
 dispatch({ type: PRODUCT_CREATE_RESET }); // 進入頁面先重置新增產品狀態
 if (successCreate) {
  // 若成功新增產品,導向到該產品編輯頁面
  navigate(`/admin/product/${createdProduct.id}/edit`);
 } else {
  dispatch(listProducts());
 }
}, [dispatch, navigate, successDelete, successCreate, createdProduct]); // 這邊放 successDelete,因為要在刪除使用者後自動重新載入頁面

const createProductHandler = () => {
 dispatch(createProduct());
};

const deleteProductHandler = (id) => {
 if (window.confirm("確定要刪除此產品嗎?")) {
  dispatch(deleteProduct(id));
 }
};
目前進度應是按下新增產品後,能夠成功創建一個新的產品,但由於編輯頁面還沒製作所以會導向至先前寫好的 404 頁面
# 產品(新增/編輯頁面)頁面前端實作
直接複製用戶編輯頁面 UserEditPage.js 來進行微調
- 稍後會來修改可直接上傳更新產品圖片的功能,而不是現在只有輸入圖片路徑的功能
// ProductEditPage.js
const ProductEditPage = () => {
 const navigate = useNavigate();
 const { productID } = useParams(); // 要跟 App.js 裡定義的 :productID 路由名稱一樣

 const [name, setName] = useState("");
 const [price, setPrice] = useState(0);
 const [image, setImage] = useState("");
 const [brand, setBrand] = useState("");
 const [category, setCategory] = useState("");
 const [countInStock, setCountInStock] = useState(0);
 const [description, setDescription] = useState("");

 const dispatch = useDispatch(); // 用來發送 action 的 hook

 const productDetail = useSelector((state) => state.productDetail); // 列出用戶資料
 const { loading, error, product } = productDetail;

 const productUpdate = useSelector((state) => state.productUpdate);
 const { loading: loadingUpdate, error: errorUpdate, success: successUpdate } = productUpdate;

 const submitHandler = (e) => {
  e.preventDefault();
  dispatch(
   updateProduct({
    id: productID,
    name,
    price,
    image,
    brand,
    category,
    countInStock,
    description,
   })
  );
 };
 useEffect(() => {
  if (successUpdate) {
   dispatch({ type: PRODUCT_UPDATE_RESET });
   navigate("/admin/productlist");
  } else {
   if (!product || !product.name || product.id !== Number(productID)) {
    dispatch(listProductDetail(productID));
   } else {
    setName(product.name);
    setPrice(product.price);
    setImage(product.image);
    setBrand(product.brand);
    setCategory(product.category);
    setCountInStock(product.countInStock);
    setDescription(product.description);
   }
  }
 }, [dispatch, product, productID, navigate, successUpdate]);

 return (
  <>
   <Link to='/admin/productlist' className='btn btn-light my-3'>
    回到產品列表
   </Link>

   <h1>編輯產品資料</h1>

   {loading ? (
    <Loader />
   ) : error ? (
    <Message variant='danger'>{error}</Message>
   ) : (
    <FormContainer>
     <Form onSubmit={submitHandler}>
      <Form.Group controlId='name' className='mb-3'>
       <Form.Label>產品名稱</Form.Label>
       <Form.Control required type='name' placeholder='請輸入您的ID' value={name} onChange={(e) => setName(e.target.value)}></Form.Control>
      </Form.Group>
      ...
      <Form.Group controlId='image' className='mb-3'>
       <Form.Label>產品圖片</Form.Label>
       <Form.Control required type='text' placeholder='請輸入產品圖片' value={image} onChange={(e) => setImage(e.target.value)}></Form.Control>
      </Form.Group>
      <Button type='submit' variant='primary' className='mt-3'>
       更新產品資料
      </Button>
     </Form>
    </FormContainer>
   )}
  </>
 );
};
至 App.js 中添加此路由,記得要將 :productID 與 ProductEditPage的 const { productID } = useParams(); 對應,否則會找不到 ID 造成 product 變 undefined
// App.js
<Route path='/admin/productlist' element={<AdminRoute><ProductListPage /></AdminRoute>} />
<Route path='/admin/product/:productID/edit' element={<AdminRoute><ProductEditPage /></AdminRoute>} />
最後當按下更新產品按鈕時,應會觸發 submitHandler 函式,並將更新後的產品資料透過 dispatch(updateProduct({id, name, price, image, brand, category, countInStock, description})) 這個 action 傳遞給後端的 updateProduct view 進行更新,然後執行 navigate("/admin/productlist"); 導回產品列表頁面